
System

To Help.


Prior to the install process, verify the inventory of both couplers and rebar. Preparing the couplers will consist of attaching threaded rebar and taping the open end of the couplers, followed by organizing materials and preparing for installation.
If you have any questions during this process, please contact our team as we are happy to assist.
1. Examine Rebar
Examine reinforcing threaded bar end to ensure it is clean and not damaged. Clean as required.
2. Thread Coupler
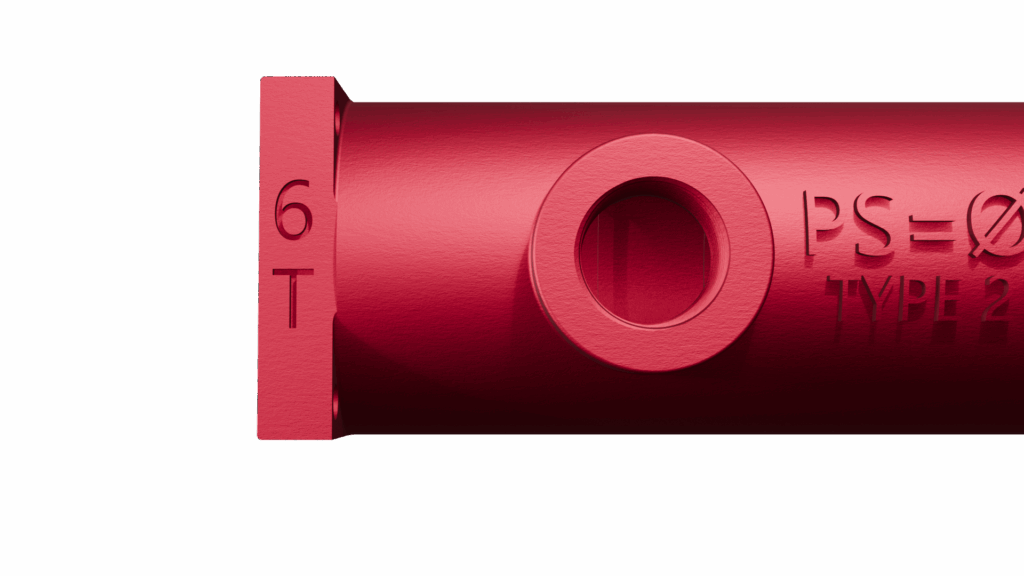
Secure threaded bar using either a pipe wrench or chain vice and thread bar into coupler until it stops. No torque specification is required for Straight Thread Couplers
3. Apply Tape
Apply provided tape to the end of the coupler. This will help to reduce seepage of grout, and concrete.
4. Organize Materials
Once couplers are threaded and taped, organize materials on pallets to allow for easy distribution to installation locations.
Before Installing –
Once materials are all prepared, you may begin the work to install the PS=Ø system. Follow these instructions and avoid deviating from the plans provided by the engineer. Improper installation of our system may result in reduced function. PS=Ø is not responsible for improper installation of our system.
If you have any questions during this process, please contact our team as we are happy to assist.
1. Install PS=Ø Closure Strip
Install PS=Ø Closure Strip to formwork
2. Install Forms/Bulkhead
Install formwork atop PSØ Closure Strip. Install required formwork to ensure chamfer will be on the top of the joint.
3. Mount Couplers
Attach couplers to formwork using nails or screws. Follow spacing and placement provided in the shop drawings.
4. Install Rebar/PT
Install Rebar Mats and PT Tendons. Ensure to install any PT AFTER PS=Ø. NO Materials should go through bulkhead aside from the PS=Ø system.
5. Place Grout Tubes
Install PS=Ø Grout Tubes. Grout tubes will self thread into coupler. Apply pressure and twist clockwise.
6. Cut/Cover
Cut PS=Ø Grout tubes flush with top of slab. Place provided plugs into grout tubes once they are cut to desired height.
7. Complete First Pour
1. Inspect Couplers
Check coupler openings, and ensure taped ends are in place.
2. Install Continuation Bar
Install Continuation Bar. Ensure rebar is seated in back of coupler and resting on lip of coupler slot.
3. Install Rebar/PT
Install Second Slab Rebar and PT Tendons. Be sure to add required form work to maintain chamfer on second pour.
4. Apply Debonding Agent
Thoroughly spray slab face, continuation bar, closure strip and Continuation Bar with the provided Bond Breaker. Apply Bond Breaker within 2 hours of 2nd pour.
5. Pour Second Slab
Before Grouting –
Grouting should not take place until after the specified curing period provided by the EOR.
Prior to grouting the PS=Ø couplers or joint, verify all of the materials have arrived on-site. Confirm condition of grout, size of joint, and usage of PS=Ø Closure Strip. Check the couplers for debris and water. Please be sure to review ACI Hot/Cold Weather Concrete Procedures.
Our grout has a working temperature range of 45° F to 90° F. Prevent grout from freezing overnight. Grout has a shelf life of 12 months from date of manufacture, and store in a cool, dry, indoor environment.
If you have any questions during this process, please contact our team as we are happy to assist.
1. Mix Grout
Follow mixing instructions on Grout Bag. Utilize required amount of water per bag of grout. Small batches are recommended as grout has a 30-minute working time and cannot be retempered.
2. Check Slump
Mix Grout for a minimum of 5 minutes. Then check slump utilizing provided slump tube and slump chart. 6” is recommended for couplers, 8” is recommended for joint.
3. Grout Couplers
Grout couplers first. Filling one grout tube completely until grout comes out opposite grout tube.
4. Grout Joint
Grout joint. Ensure grout is filling the entire depth of the slab. Utilize a trowel to get a flush finish as needed.